PREVIEWER MANUAL
General explanation
The Previewer is a tool developed by Adsolutions to help you create the best rich media creatives with ease. Our Previewer contains all of our templates which you can use to build and customize your format of choice. You can upload your assets, amend the code and create a preview. You can even collaborate on an ad with a colleague, client or agency by using the share function of the Previewer.
Additionally, using the Previewer will also significantly speed up the trafficking process. Using the Previewer in combination with our templates guarantees the quickest turnaround time so your campaign can go live on the intended start date.
All of our templates should be available in the Previewer, but if your format of choice is not there please feel free to contact [email protected].
Building an advertisement happens in a few steps, which are shown below:
- Open a new template.
- Customize your creative.
- Preview and share your advertisement.
- Request a tag.
This documentation explains the different functionalities in the Previewer and shows you step by step how to set up and maintain your ad. If you still have unanswered questions after reading this manual, please reach out to us at [email protected].
Index
1.1 Login
1.2 Logout
1.3 Reset password
2.1 General explanation about the top menu
3.1 How to create a new project?
3.2 How to copy a project?
3.3 Correct naming
4.1 Info tab
4.2 Manage files tab
4.3 Edit code tab
4.4 Clicks tab
4.5 RM events tab
4.6 3rd party tab
4.7 Flight management tab
5.1 What will happen after you click the tag request button?
6.1 Definitions of the click events
6.2 Definitions of the RM events
1 Login page
1.1 Login
The first thing you will see when you visit our Previewer is the login page. On this page you can fill in your credentials which will log you in to the Previewer environment.
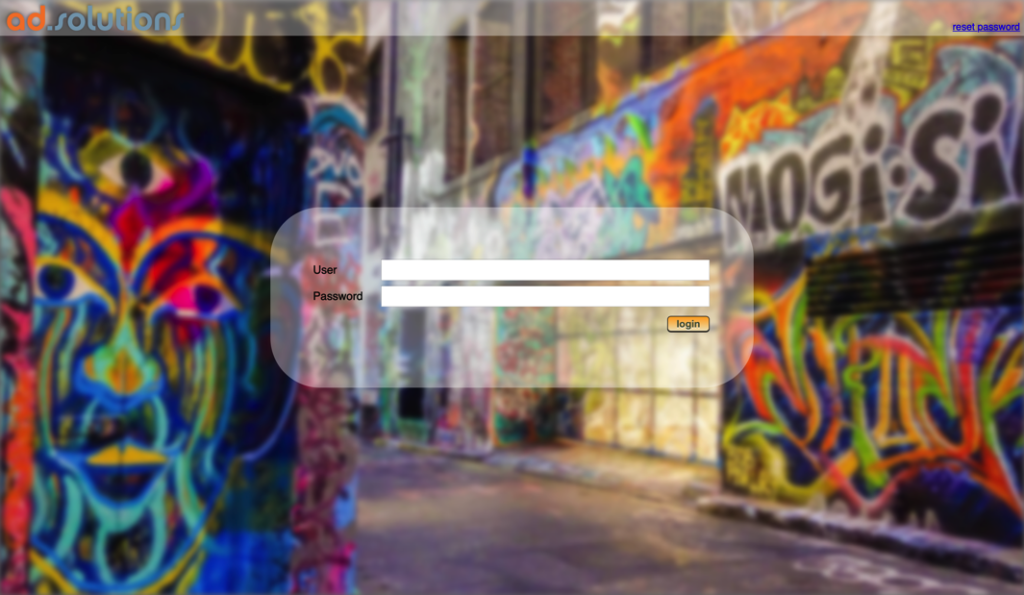
Enter the username and password you received from us and click on login.
1.2 Logout
In some occasions you might want to logout from the Previewer.
You can do so by adding → ?logout=1 to the URL so, the URL will look like this:
→ https://previewer.adsolutions.com/?logout=1
Using this URL will log you out of the Previewer and redirect to the login page.
1.3 Reset password
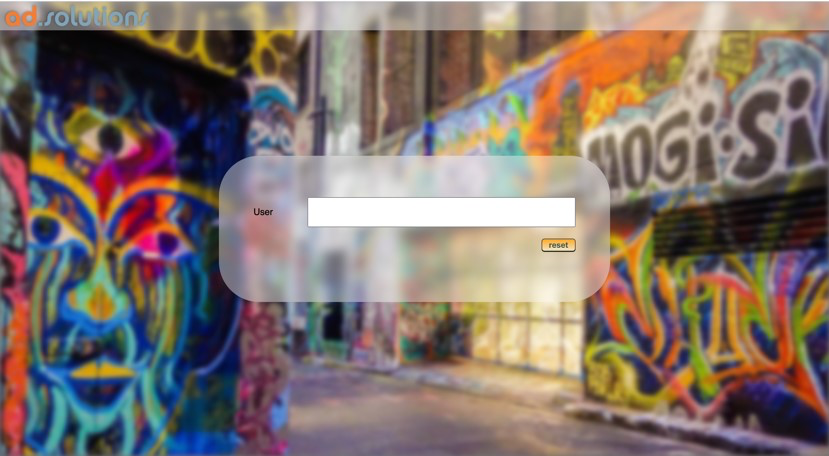
In the top right corner of the login page you will find the reset password button. Clicking on this will redirect you to a page where you can enter your username to reset your password. After pressing reset, an email will be sent to the email address linked to your account, with which you can reset your password.
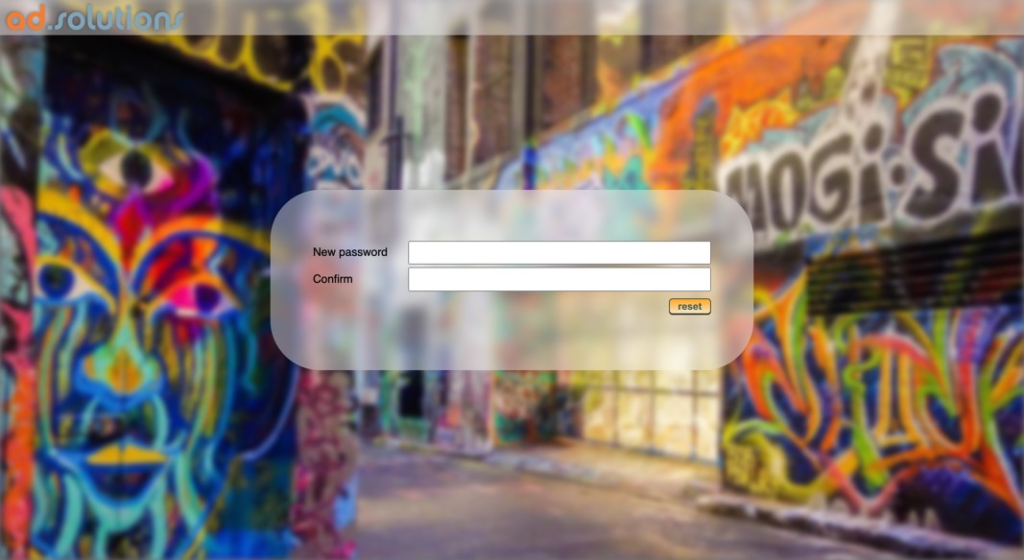
After the confirmation you will receive an email with a link which will redirect you to the password reset page.

Choose your new password and confirm it. After clicking on reset, your new password will be saved and you will be automatically logged in.
2 Top menu
2.1 General explanation about the top menu
After a successful login, you will enter the Previewer environment. Here you will see a large grey work field and a header with different functions.
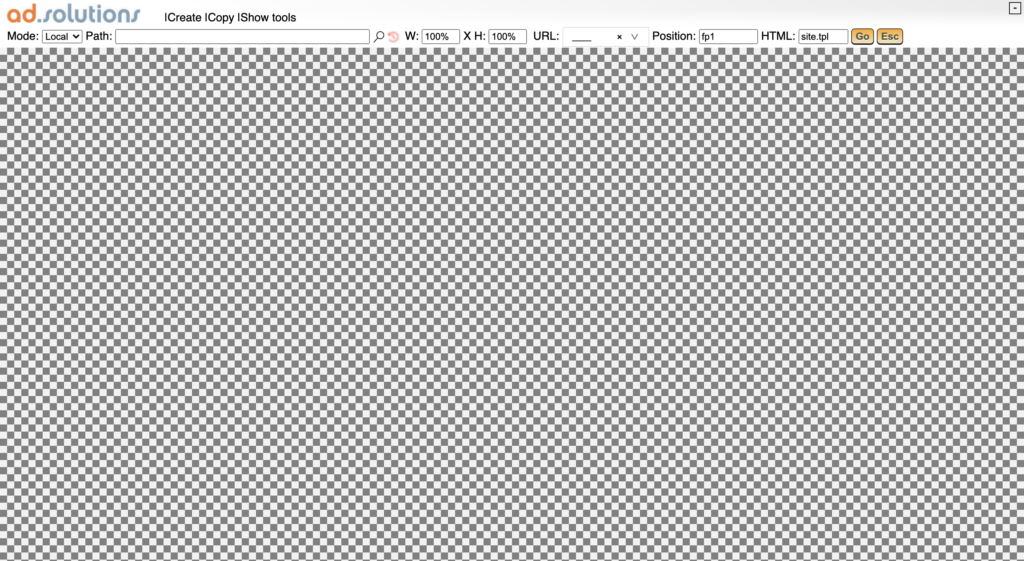

When the panel is maximized, the maximize symbol will change to this symbol. This will minimize the panel, which allows you to have a peak at your ad in the Previewer. See the first picture down below.

You can find this icon in the top right of the page of every panel. If you click on this symbol, it will maximize the panel. See the second picture down below.
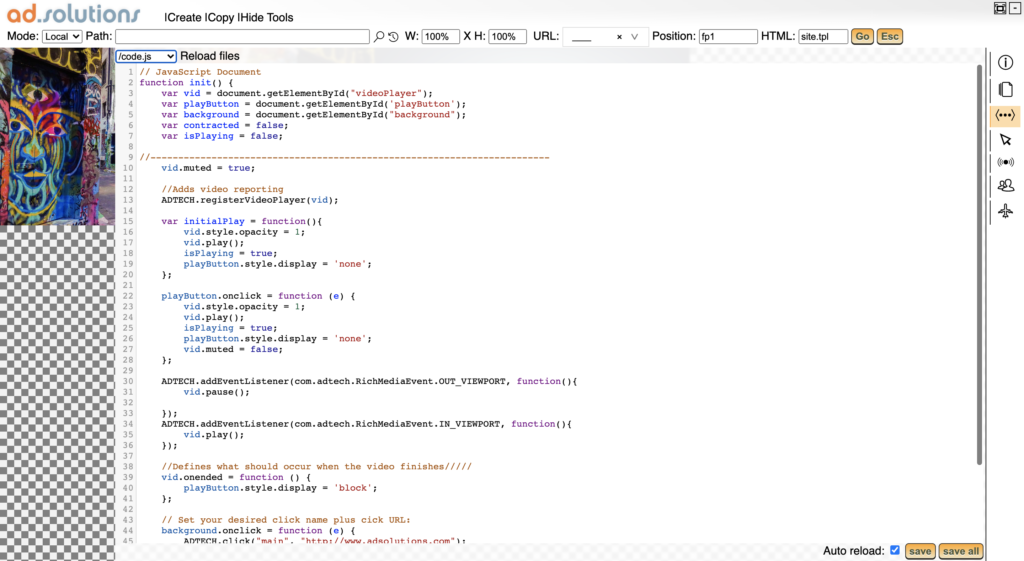
The header menu contains a number of buttons and functionalities. Below you will find a brief explanation on what all buttons do.

- Create allows you to create a new project using one of our templates.
- Copy allows you to copy an existing project.
- With show tools, the toolbar appears on the right. When the toolbar appears on the right, show tools will change to hide tools. If you click on hide tools, the toolbar will be hidden.
- Mode offers you two different options to see your created ad. With the local mode you can only see your ad. Proxy gives you the opportunity to see your ad on a website.
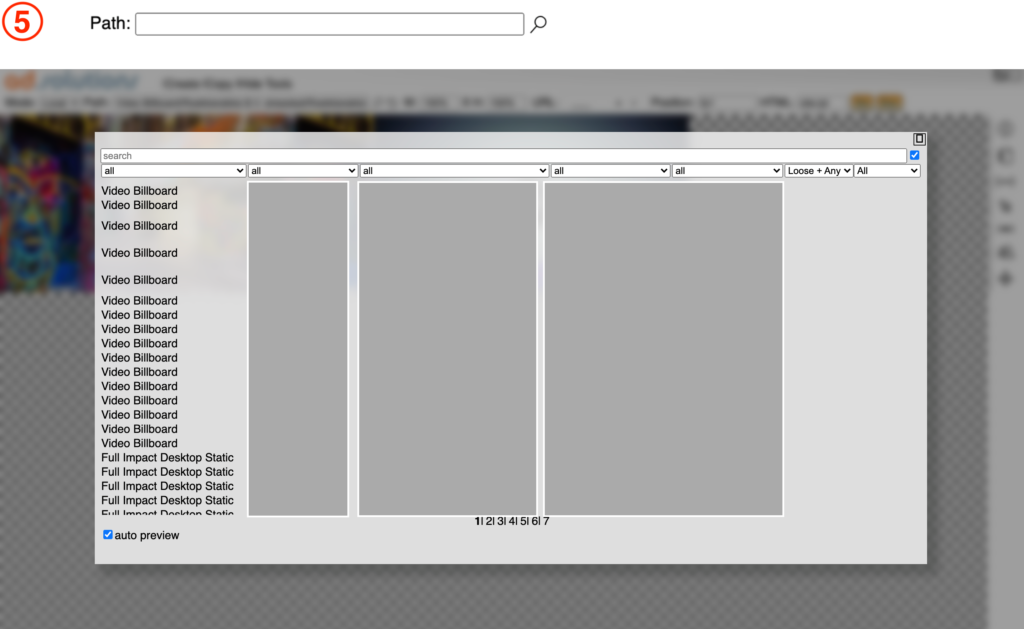
- The path is the directory on our server where your project is created / saved. For a more detailed explanation, please consult chapter 4.1 (Info tab). If you click on the magnifying glass, you can easily search and select your projects. A new window will appear in which you can set your filters to search your ad (see image 5 on the next page).
- This button will open a list which shows your recently opened creatives.
- In W you can set the width of your work field. You can use any CSS value in this field (pixels, percentages etc).
- In H you can set the height of your work field. You can use any CSS value in this field (pixels, percentages etc).
- You can choose on which website you want to see your created ad. We use shortcuts for the URLs of the different publishers. Fill in the full name or shortcut of the publisher and we will preview your ad on your chosen domain.
- You can choose on which position (placement) of the website you want to see your ad. The Previewer must be set to proxy mode for this. We strive to have three standard positions available for all websites, but if your chosen placement doesn’t work or if you are in need of different placement, please contact us at [email protected].
- fp1 → this is the first placement position created by us. Typically this placement is used for formats that reposition itself, such as skins.
- leader1 → this is the leaderboard position.
- rect1 → this is the rectangle position.
- In the input field of the HTML you can fill in the template of the sites HTML.
- Go, will commit your header changes to the work field.
- Esc, will open a new tab with your advertisement.
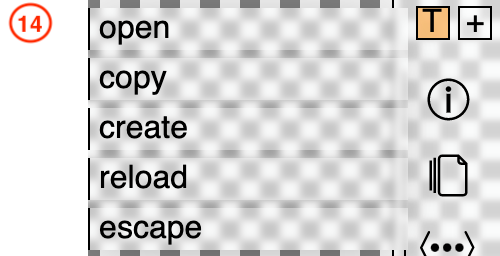
- Clicking on the [–] icon in the top right will hide the header. The [-] will be replaced by [+]. If you click on the [+] button, the header will be shown again. Next to the [+] button, the T button will appear. If you hover over the [T] button, a drop down menu will be shown with a few handy function of the header. See image 14 down below.
- Open will open a creative.
- Create will create a new creative.
- Reload will reload the creative.
- With escape you can break out the Previewer.
3 Create
3.1 How to create a new project?
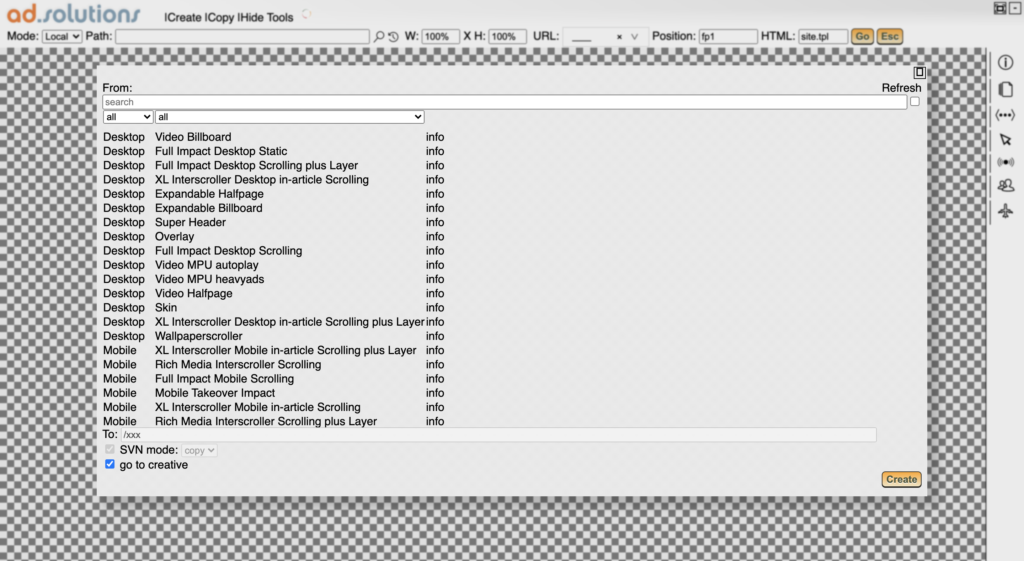
To start a new project, simply press the create button. The create option can be found in the top menu of the page. After clicking the create button, a menu will open displaying the available templates.
At the top right of the prompted window can see a refresh button. This button will refresh the list of the available templates.
If you would like more information about a specific template you can click on the info button next to the name of the template. You will be redirected to the specific format page on our website, where you can find the specifications and other information.
3.2 How to copy a project?
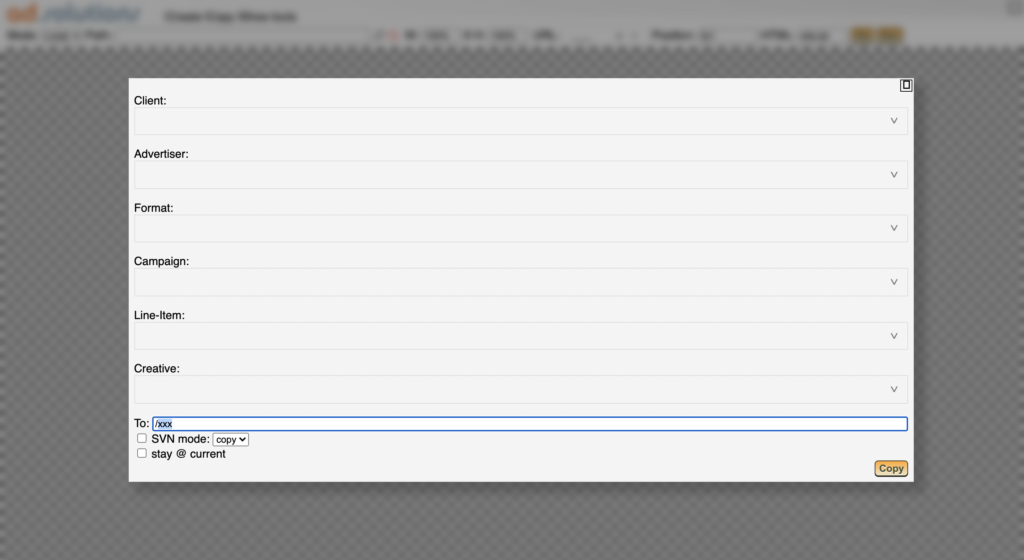
To copy a project you will first need to open the project you wish to copy. Once opened, click on the copy button in the top menu and a form will appear. In this form you will have to fill in some details (i.e. the name of the advertiser and the campaign name). This will help us keep our side organized!
If you want to stay in the current creative, just check the ‘stay @ current‘ checkbox. If not, you will be redirected to the new creative that you have copied.
3.3 Correct naming
After deciding and selecting the template you want to use, a form will appear. In this form you will be prompted to fill in some information regarding the campaign (i.e. the advertiser and the campaign name). This will generate the correct path on our servers as well as keep things organized for both you and us.
- The name of the advertiser.
- The name of the format will be filled in automatically.
- It is required to fill in the name of the campaign.
- The line-item name is optional.
- In creative you need to fill out the name of the creative.
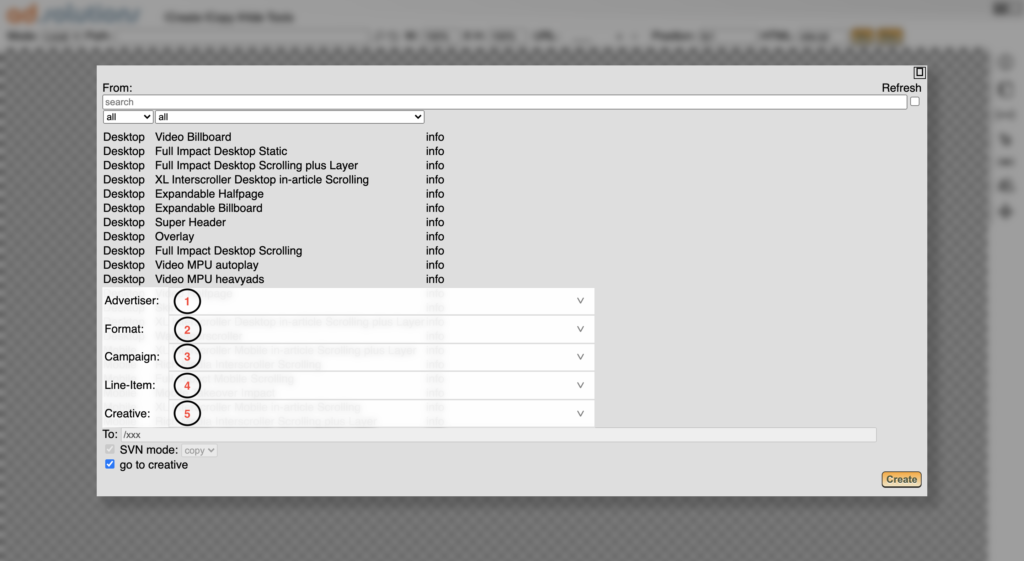
After filling out all the fields, you can click on create. The info in the fields can always be changed afterwards. We do recommend you to think about the name. Using the most logical information will make it much easier to organize and share your work. In the bottom left you will find a checkbox named ‘go to the creative’. If you check this box, it will automatically send you to the creative when you click on create. Leave this box blank and it will leave you at your current creative.
4 Toolbar
4.1 Info tab
In this tab you will find the change-log information. You can see which user has edited the ad and when this happened. In the info tab you can also share your project with someone using the share with function. It is possible to collaborate with your colleague on the same creative, or share your creative with an agency or client. The share with function is only available for the publishers account.
To enable sharing with someone, this person (also) needs to have a Previewer account. Furthermore the company this person works for needs to be connected to yours.
The top menu of an agency or client does have one extra function: “Client“.

In the drop down menu you can choose between different projects / publishers you are connected to. Furthermore, yo ucan edit the code and share this with the person you are collaborating with.
Using the drop down menu in the info tab, you can choose the company you would like to share the ad with. You share the path of the creative with the person you want to work with by email.
If you would like to use one of our templates or files that are stored on your local machine instead of files that are uploaded in the previewer, you can add the URL of your localhost with your project by using local assetPath. The Previewer will ignore the files in the Previewer and instead use your local project files. Make sure you have a webserver running on this “local assetPath”, serving your project files.
You have the option to undo changes or share your changes. This will only show up if you have made changes to the code.

4.2 Manage files tab
On this page you will find all the files that are in your project. You can easily add files by dragging them from your computer to this tab. If you want to upload a folder and keep the file structure intact, please zip the folder first before uploading it. In the top you’ll find a mini menu with a couple of useful functions.
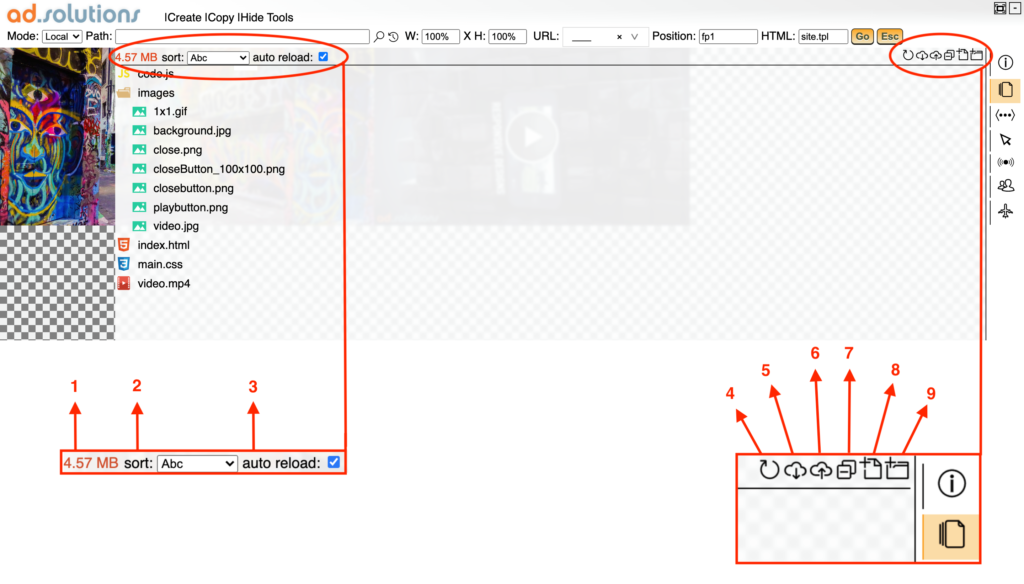
- Usage: for an optimal user-experience try to keep the file size as low as possible. If the usage turns red, it means that it’s above 4MB. When it turns green, it means you’re good to go. Also keep in mind Google’s heavy ad policy, which might block creatives above 4MB.
- Sort offers you the opportunity to sort files alphabetically, by filetype, by date or by directory.
- If auto reload is checked, it will automatically reload your creative after uploading or deleting a file.
- Reload structure will reload all your files to structure them again.
- Clicking on the download button will download all files from your project on the previewer. This is useful if you i.e. prefer to work in your own developing environment (IDE), or if you wish to have a backup on your local file system.
- Lets you upload files. If you want to upload a folder, please make sure you zip the folder before uploading.
- Collapse all directories
- Add an empty file
- Add new directory

When hovering over the different files or directories you will see a number of useful icons on the right.
- Name of the file, filesize and last change date.
- Rename
- Upload files
- Add empty file
- Add new directory
- Remove
- Duplicate
- Upload replacement file
Clicking the check mark will accept changes and the X will decline changes. Each change you perform is staged first, so you cannot change or remove something by accident. Each change needs to be either approved or rejected.

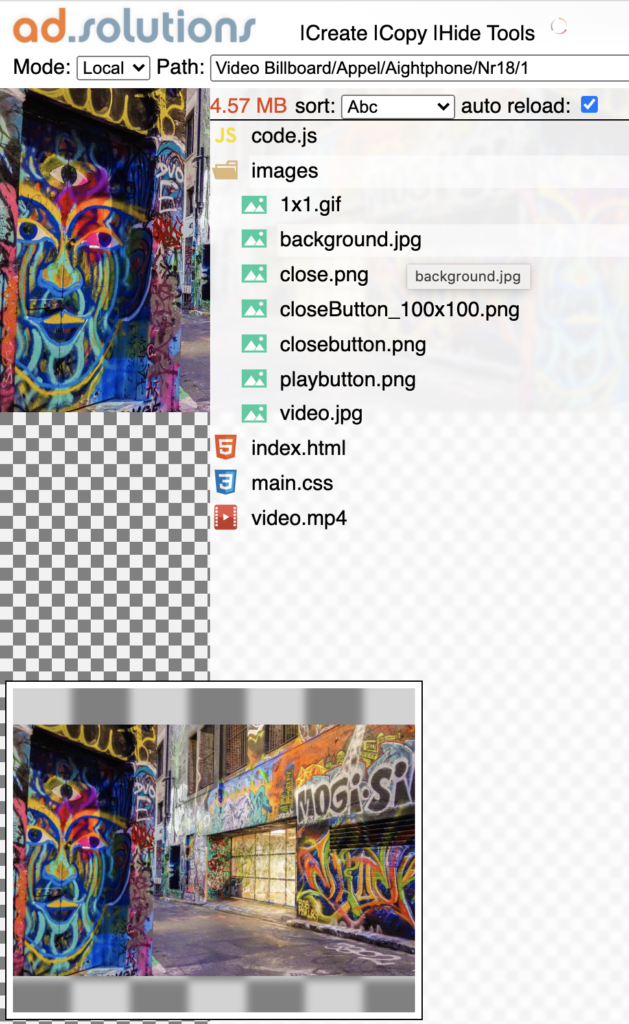
Hovering over the name of an image or a video will display a preview of the image on the bottom left of the Previewer. Clicking on code files (HTML, JS, CSS) will open the code editor.
4.3 Edit code tab
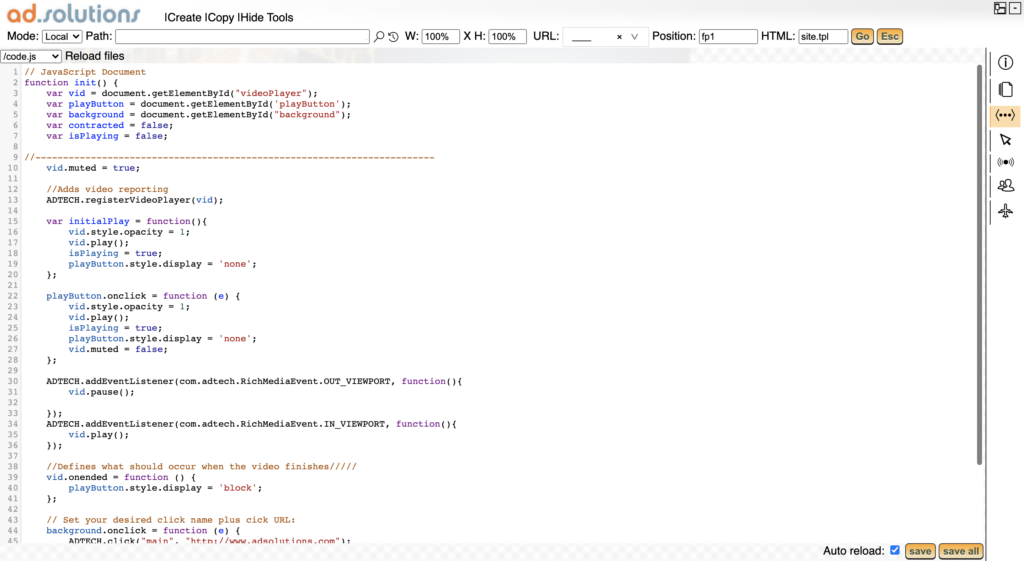
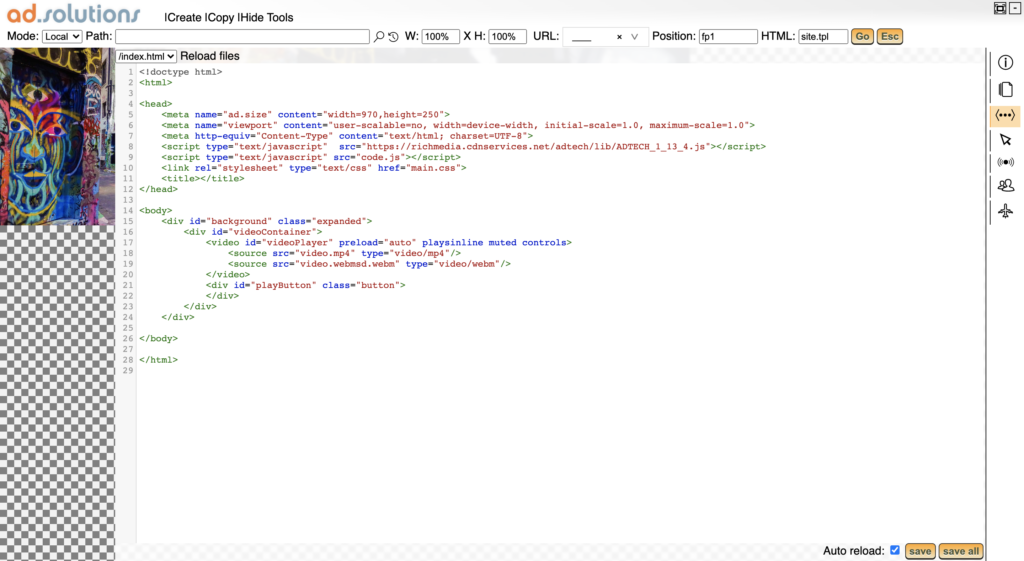
In this tab you can edit the code. If you check the auto reload box and click on save, the preview will reload automatically, reloading your creative to show the latest changes every time you save it. The save all button will save all changes in all files of this project. At the top left you can find a drop down menu with which you can navigate through your files. Reload files will reload all the files.
4.4 Clicks tab
In the Clicks tab you can easily add the destination URL or click tracker to your creative. You can create the click event yourself and assign it to a part of your advertisement. Below you can find the function that should be called on your desired click handler:
ADTECH.click("nameYouWantForThisClickEvent", "theURL");

An example of implementing this would be:

document.body.onclick = function (){
    ADTECH.click("nameYouWantForThisClickEvent", "theURL");
}
Refresh will refresh the list and to save your changes in this tab you simply click the save button.
For a definition list of the clickevents you can go to chapter 6.1 of this manual.

You can enter the same URL for all clicks swiftly by using the “replace all” function, which can be found in the top right of the clicks tab. If you click on the function an input field will appear where you can paste a URL of choice. If you then click on ok, all the fields will be filled with that URL. Clear all will clear all the fields in one go.
The input fields will stay red as long as they are not filled with a valid URL.


4.5 RM events tab
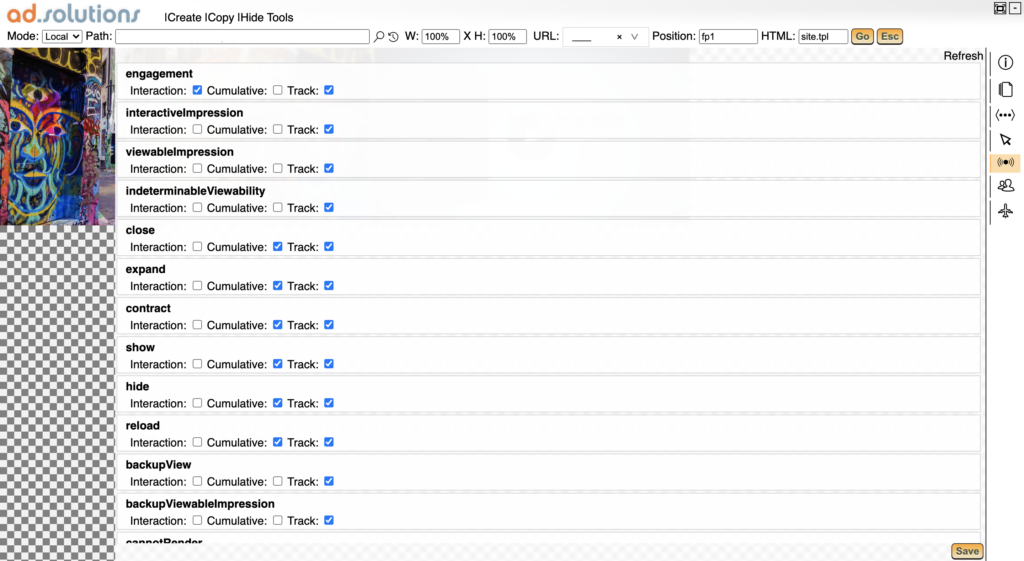
In this tab you can set all other events you would like to track. We have reports available for all events listed in this tab.
There are three checkboxes per event which you can check:
- Interaction: When checked, this event will be added to the total number of interactions on this ad.
- Cumulative: If the cumulative box is checked, an event will be registered for every single time it occurs. If the checkbox is unchecked, each event will only be registered once.
- Track: This indicates if the event is being tracked or not.
In the appendix you will find a list with definitions of all our RM events. If you would like to track an event that is not in the list yet, just send an email to: [email protected] and we will add it to your RM events.
Additionally, you can also add custom events to your creative. Custom events can be defined like this:
ADTECH.event("MyEvent");
Give your event a name, and simply implement this in your eventhandler or function of choice. It will then appear in the events tab and you are good to go.
4.6 3rd party tab
All the event information is available in our ad server, but if you wish to do so you can track all the events in your creatives in your own adserver as well. You can add a tracker for every event that is available in the events tab.
In the 3rd party tab you can easily add trackers to your creative, just:
- Add the impression tracker in the URL field.
- Select the Type of your impression tracker (Image, Redirect or JavaScript).
- Select Impression in the Track on field.
- Press Save
You can track every event available in your creative by following the above steps and simply select the right drop down in the Track on field and Event field (after selecting Specific Click and Specific Event).
You can choose to track multiple events. Simply click add + at the top right to add another tracker. Refresh will refresh the list. Recycle will undo deleted trackers within the current view.

4.7 Flight management tab
In this tab you can send us a request for a tag. The name of your creative will be prefilled based on the data you entered when you created the ad. If you want you can change the campaign info here; the path on our server will remain the same. This campaign info can always be changed afterwards.
- Order Name: Name of the campaign.
- LineItem Name: Line-item name.
- Creative Name: Name for this specific ad within a campaign. If there is just one advertisement within a campaign you can leave it blank and we will give it a name for you.
After you have finished adding the required info, you can click on the request tag button to request a tag. We will then receive an email with your request and we finish processing the ad.
After we have created a tag, this tag will show up in the tag field in your previewer environment. You can select the correct ad server, DSP or SSP you would like to use. Based upon your selection, the Previewer will add the right macro’s to the tag. If your desired ad server, SSP or DSP is not available to select yet, please send an email to [email protected] with your request including the information about the macro’s and we will add the new macro’s to the Previewer.
You can uncheck the cookies checkbox if you don’t want to use cookies and you can uncheck the consent checkbox if no consent is needed for your creative. In the Domain field, you can find the domain from which we will serve the ad.
You can either copy or download the tag after we pushed.
In the Flight management tab you can also generate a preview of your creative. You can set previewer mode on either desktop or mobile. You can add multiple URLs of websites to preview your creative on. We use shortcuts for the URLs of the different websites just like the URL function in the header, see 2.1 (Top menu).
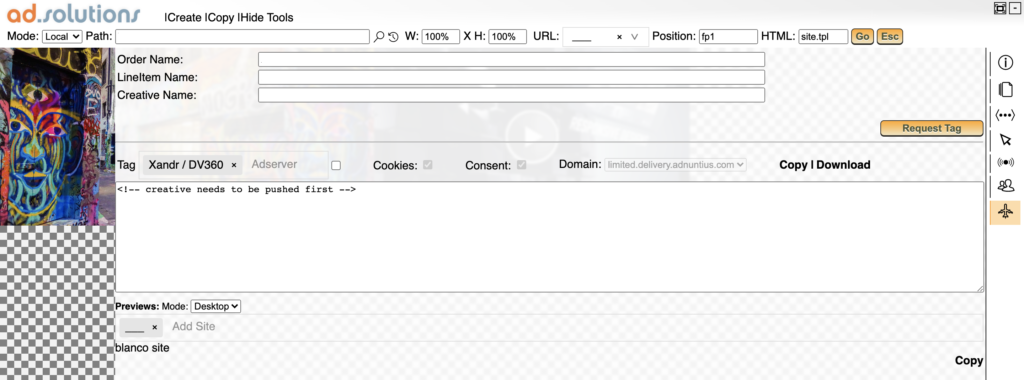
After you have selected the right mode and URL, you can either click the link, which has appeared or press Copy to copy the URL and paste it in a browser.
5 Tag request
5.1 What will happen after you click the tag request button?
After requesting a tag, we will receive an email with your code. We will review the creative, add some info if needed and will create a tag. This tag will appear in the Previewer (Flight management tab) or we will send the tag by email.
You simply book our tag in your ad server, SSP or DSP.
6 Definition list
6.1 Definitions of the click events
| Definition list click events | |
|---|---|
| default | If the advertisement doesn’t want to show up, the default URL will show up to replace the main URL. |
| main | This is the main URL of the advertisement. |
| backupImageClickthrough | |
| clickedOnPlay expanded | |
6.2 Definitions of the RM events
| Definition list RM events | |
|---|---|
| engagement | Number of people who saw a piece of content and engaged with it. |
| interactiveImpression | The ratio of Rich Media ad interactions to the number of times the ad was displayed. |
| viewableImpression | Number of times that an ad appears at least 50% on the screen for more than one second. |
| indeterminableViewability | Number of the times that the ad server didn’t know if an ad was visible, for example an unfriendly iframe. |
| autoClose | Number of times that someone clicked on the close button in the ad. |
| expand | Number of times that the dimensions of an ad changed to expand. |
| contract | Number of times that the dimensions of an ad changed to contract. |
| Show | Number of times that the advertisement showed. |
| Hide | Number of times that someone clicked on the hide button in the ad. |
| Reload | Number of times that the advertisement reloaded. |
| backupView | Number of times that the backup view was viewable. |
| backupViewableImpression | Number of times that the backup view was viewable. |
| cannotRender | Number of times that the ad couldn’t render. |
| Video Play | Number of times that the video played. |
| Video Start | Number of times that the video started. |
| Video first Quartile | Number of times who watched the video to the first quartile. |
| Video Midpoint | Number of times who watched the video to half. |
| Video Third Quartile | Number of times who watched the video to the third quartile. |
| Video Complete | Number of times who watched the video till the end. |
| Video Mute | Number of times who muted the video. |
| Video Unmute | Number of times who unmuted the video. |
| Video Pause | Number of times who paused the video. |
| Video Replay | Number of times who paused the video. |
| Video Resume | Number of times who resumed the video. |
| Video Seek | Number of times who seek for the video. |
| Video Fullscreen | Number of times who watched the video full screen. |
| playVideo | Number of times who played the video. |
| closeLayer | Number of times who closed the layer. |

