FLOORAD DOCUMENTATION
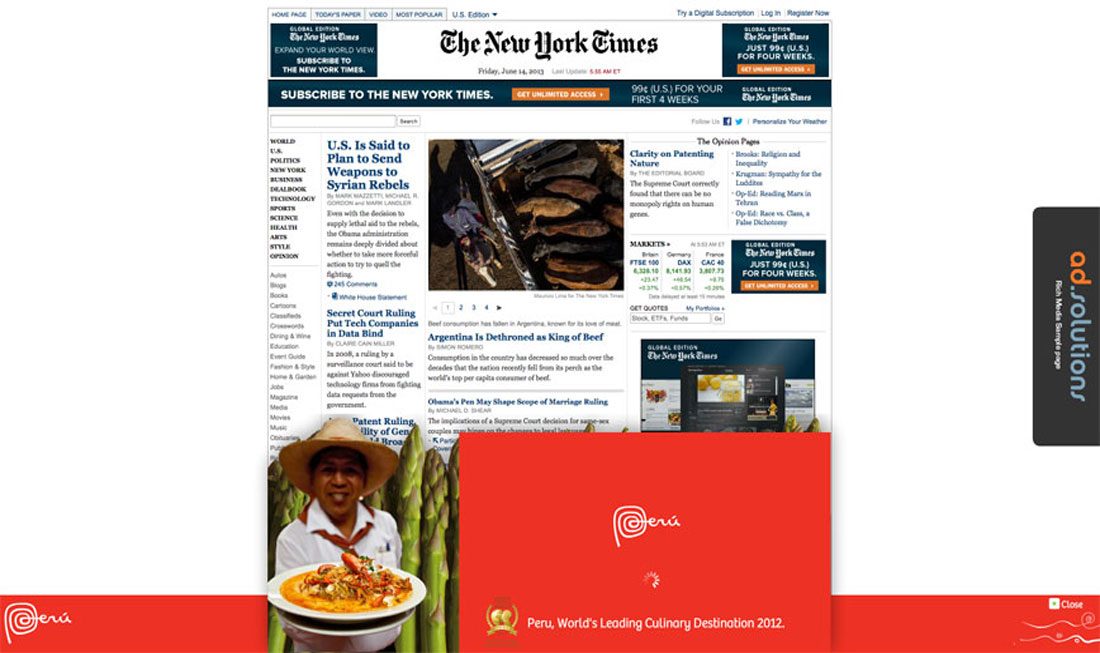
The templates are made as basic as possible so you have a simple starting point to begin building your creative.
The template consists of the following assets:
- index.html
- main.js
- main.css
index.html
The head of the html contains the ad size and links to the core library and the other two template assets.
<!DOCTYPE html>
<html>

<head>
	<meta name="ad.size" content="width=0,height=97" />
	<script type="text/javascript" src="http://onecreative.aol.com/ads/jsapi/ADTECH.js"></script>
	<link rel="stylesheet" href="main.css" />
	<script src="main.js" async></script>
</head>
The body contains two main divs; the contracted and expanded divs. The contracted div is the one displayed on 100% width and 97px height. Until a user clicks the close button. The expanded div is the one that comes into view when a mouse over on the contracted div is done. It contains a video player and both contain a clickLayer.
<body>
	<div class="contracted">
		<div class="clickLayer"></div>
		<div class="closeBtn"></div>
	</div>
	<div class="expanded">
		<video src="video.mp4" preload="none"></video>
		<div class="clickLayer"></div>
	</div>
</body>
main.js
The main.js together with the main.css takes care of the animation of the expandable part and logic for video and clicks. It first declares a bunch of variables. And is wrapped in the ADTECH.ready function. To make sure our library is available before the logic within the body is applied. The highlighted line registers the video element so we are able to measure video events and report on them. You can also see two functions that do something based on the status of the video. onended and onpalying. You can add your content within these functions if you want to make something happen during playback or when the video is complete.
	ADTECH.ready(function(){
		var vid = doc.querySelector('.expanded>video');
		var cls = doc.querySelectorAll('.closeBtn');
		var clc = doc.querySelectorAll('.clickLayer');
		var expElm = doc.querySelector('.expanded');
		var contElm = doc.querySelector('.contracted');
		var ply = doc.querySelector('.playButton');
		ADTECH.registerVideoPlayer(vid);
		vid.onended = function(){
			expElm.classList.add('videoComplete');
			expElm.classList.remove('videoPlaying');
		}
		vid.onplaying = function(){
			expElm.classList.remove('videoComplete');
			expElm.classList.add('videoPlaying');
		}
The next section defines the interactions. And takes care of calling the doContract(), doExpand(), ADTECH.close() and vid.play() functions.
		//define interactions
		for(var i=0;i<cls.length;i++){
			if(cls[i].classList.contains('contract')){
				cls[i].onclick = function(){
					doContract();
				}
			}else{
				cls[i].onclick = function(){
					ADTECH.close();
				}
			}
		}
		if(ply != null){
			ply.onclick = function(){
				vid.play();
			}
		}
		!function(){
			var overCnt=0;
			expElm.onmouseover = contElm.onmouseover = function(){
				overCnt++;
				clearTimeout(tmoId3);
				if(contracted){
					clearTimeout(tmoId);
					tmoId = setTimeout(doExpand,750);
				}
			}
			expElm.onmouseout = contElm.onmouseout = function(){
				if(!contracted && overCnt == 1){
					clearTimeout(tmoId3);
					tmoId3 = setTimeout(doContract,750);
				}
				overCnt--;

			}
		}();
The main.js file is also the spot where the click name is implemented. Don’t worry about setting the URL as we enter this in the system when the ad is uploaded.
//define clicks
		for(var i=0;i<clc.length;i++){
			clc[i].onclick = function(e){
				if(e.target.parentNode != doc.body){
					if(e.target.parentNode.classList.contains('expanded')){
						ADTECH.click('expanded');
						return;
					}else if(e.target.parentNode.classList.contains('contracted')){
						ADTECH.click('contracted');
						return;
					}
				}
				ADTECH.click('general');
			}
		}
Next we have the doExpand() and doContract functions. As the names suggest take care of the expand and contract of the expanded div and pauses or plays the video accordingly.
             function doContract(){
			if(contracted) return;
			contracted =true;
			ADTECH.ready(function(){
				clearTimeout(tmoId2);
				tmoId2 = setTimeout(function(){
					ADTECH.contract();
				},700);
			});

			//pause the video and hide it
			if(vid != null){
				vid.pause();
			}
			doc.body.classList.remove('expanded');
		}
		function doExpand(){
			if(!contracted) return;
			contracted =false;
			clearTimeout(tmoId2);
			ADTECH.ready(function(){
				ADTECH.expand();
			});
			doc.body.classList.add('expanded');
			vid.play();
			vid.currentTime = 0;
		}
And finally two event listeners for mouse over and mouse out. Feel free to add your own content within these if you want to make something happen when a mouse over or out is done.
		//on mouse over, start the timer to expand
		ADTECH.addEventListener(com.adtech.RichMediaEvent.MOUSE_OVER, function(e){
			clearTimeout(tmoId);
			if(contracted){
				tmoId = setTimeout(doExpand,750);
			}
		});
		//on mouse out, cancel the expand timer
		ADTECH.addEventListener(com.adtech.RichMediaEvent.MOUSE_OUT, function(e){
			clearTimeout(tmoId);
		});
SUPPORT
During the design phase we can provide you with a preview URL so you can see the work in action and make changes to your design accordingly. Send us the source files and fonts to [email protected] (WeTransfer preferred)
Final creative or requests for a preview can be send to [email protected]
Also read the GENERAL DOCUMENTATION fur further reference on building HTML5 ads.
